Thursday, February 7, 2019

Using Machinekit on the BBB - a hands on log of how I did it, by Malte Scmidt

When setting up my machine  I realized that, while all needed information was available somewhere, the information was somewhat scattered around and it took some time to figure out what was relevant and what was not.
I therefore collected some notes and thought about posting this somewhere (blog) to help others. I have some background in Linux and Linuxcnc (PC) as user and did therefore not note down line for line but rather tried to capture the overall process of getting machinekit to work on a BBB. 

BR,
Malte

(This document was written in December 2018/January 2019)

The challenge:
    Automate a lathe with 2 steppers, limit switches
    Allow for manual turning using encoder input for x, z
    Provide glass scales input for manual turning (this may be considered gold plating but my initial plan was to use this lathe in CNC or manual mode)
    Obviously have spindle feedback and control the lathe motor
    Ideally controlled via touchscreen.

My leanings:

I considered the following approaches:
    With the amount of inputs required a 
    - parallel port solution would only be feasible if multiple parallel ports are used. -> decided against it
    - MESA card solution requires two cards -> expensive, decided against it
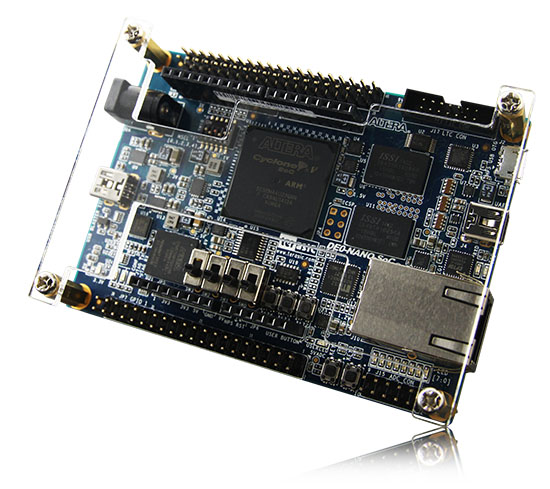
    - A beagle bone based solution with GPIO and PRUs -> my tentatively selected approach. Downside of this is the poor graphic performance

Linux on the Beagle Bone Black:
    Three different options exist for Realtime in the Linux Kernel
    - RTAI
    - RT_PREEMPT
    - Xenomai

    All are patches to the vanilla Linux kernel. 
    - RTAI is old and seems to be superseded by...
    - RT_PREEMPT which will be adapted by main Linux kernel
    - Xenomai is commercial

    My takeaway is that RT_PREEMPT would be ideal but Xenomai is a possible option.
    
    Two different Debian Linux distributions have been considered:
    - Stretch
    - Jessie

    To get a Debian distribution and one of the realtime kernels on the beagle board three approaches have been explored:
    1) Putting it together by hand (https://machinekoder.com/machinekit-debian-stretch-beaglebone-black/)
    2) Getting Stretch + RT_PREEMPT from eLinux (http://www.machinekit.io/docs/getting-started/machinekit-images/ and https://elinux.org/Beagleboard:BeagleBoneBlack_Debian#BBW.2FBBB_.28All_Revs.29_Machinekit)
    3) Getting Jessie + Xenomai from eLinux (see links above)

    Findings
    - Current RT_PREEMPT + Stretch combinations 1) and 2) above have long boot times of 2-4 minutes.
    - The blog post in 1) is a good read in any case to perform some steps to get the system up to date and further improve boot times
    
    Flashing
    - I was not able to flash using the procedures described in most online places. I booted from SD and than used the approach outlined (https://stackoverflow.com/questions/33930747/how-to-flash-beaglebone-black-emmc-with-debian-8-2-image)
        cd /opt/scripts/tools/eMMC/
        sudo ./init-eMMC-flasher-v3.sh

    I'm currently using Jessie and Preempt_RT because I'm lazy. There is some background here on the boot time issue which will hopefully be resolved in the future:
    https://groups.google.com/forum/#!topic/machinekit/sOWj5I7fVpo
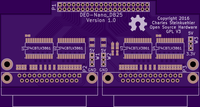
    
Cape support
    - No commercially available cape was suitable to be used with my requirements. So I decided to go with a Sparkfun prototype cape and wire up things from there.
    
    The name of the board coded in the EEPROM will tell which device tree overlay file to load. The device tree overlay file declares the pins we can use with this cape.
    (cf https://github.com/jbdatko/eeprom_tutorial/blob/master/eeprom.md)
    
    With different Linux versions different approaches exist how this is achieved.
    Linux 3.8 / Xenomai + Jessie uses cape-manager
    Linux 4.4 / Preempt_RT + Stretch uses U-boot overlays

    Most resources in the internet are about capemanager.
    
    We need two things for loading the cape during boot:
    -- EEPROM
    -- Device Tree overlay file

    - The easiest way to get through this is using existing device tree overlay files. (https://github.com/cdsteinkuehler/beaglebone-universal-io)
    - This means that the eeprom needs to be coded such that those are loaded. 
      Use https://github.com/picoflamingo/BBCape_EEPROM to write e.g. cape-universal in both the board name and revision field (I don't know which field is actually used)
    
    - For the Sparkfun Prototype cape it may be good to know that the sparkfun prototype cape addr is 0x57
    
    Checking if cape is recognized  
        capemanager:
        - Check that the cape is recognized (e.g. http://azkeller.com/blog/?p=62)
        U-Boot overlays
        - Check that cat /proc/cmdline shows overlay file handed over to kernel
        
    - Also worth to note: https://groups.google.com/forum/#!topic/machinekit/SF9xA8sdpB0 and http://derekmolloy.ie/gpios-on-the-beaglebone-black-using-device-tree-overlays/
        
        
  My board stopped booting from eMMC at this point when the cape was connected. It's unclear why 


Machinekit setups
    Get this tool: https://github.com/machinekoder/BBIOConfig/releases (bbioconfig_v1.1-7_windows_x86.zip) https://github.com/machinekoder/BBIOConfig
    To create a BBIO file that actually contains the pins and settings you intend to use
     
    Get and modify run.py from one of the different configurations (e.g. from https://github.com/machinekit/machinekit/blob/master/configs/ARM/BeagleBone/Fabrikator-Mini-CRAMPS/run.py)
     
    I created a "standard" Axis UI configuration (i.e. the selection that comes up when starting machinekit) and copied the .ini file from there. I also copied GUI related stuff (postgui.hal and xml files)
    I used the cramps hal file as starting point for my specific stuff: https://github.com/machinekit/machinekit/blob/master/configs/ARM/BeagleBone/CRAMPS/CRAMPS.hal

    My takeaways
      - Make sure to understand the constraints:
        - Pin usage and dependencies are error prone. The same output may be routed to different pins
        - You can use only one PRU (machinekit driver restriction)
    
      
Adding hardware inputs and outputs to my custom cape
    A fairly straightforward thing. I used HW-399 Optocoupler Modules to isolate all inputs. They are based on a TLP-281 chip. All powered from the beagle board.
    The outputs are generated by a 4 channel (BiDirectional - although this is not used) logic level converter module. There are integrated and discrete solutions for this on the market.
    I used a discrete version here to provide the required current (afaik <15mAh) for the optocouplers in the stepper drivers. The integrated drivers available in the market are not as capable in this regard.

    Overall 16 inputs and 4 outputs are generated this way.
    
    The hardware design is not as nice but good enough for me. I mounted the logic lvel converter and one optocoupler on the proto cape.
    The other parts are mounted on 3D printed holder together with the BBB
    
The "real" User interface
    As stated in the beginning it was clear that the BBB would not deliver a good graphics performance and I looked into different options how to deal with this

    a) Axis with remote X server
    This was too slow. And also not did not meet the desire to use a touchscreen. I also did not see a way to work around this.

    b) QtQuickVCP with Cetus or a to be developed UI (for touch)
    This seems to be somewhat work in progress. The UI responsiveness was good but there were two things that I considered as downsides. The main thing was that
    the UI requires a number of user interactions to actually load. The development effort for a touch UI was another downside.
    
    c) Machinetalk with Browser based UI (WebVCP)
    This would have been a possible option to work around the different user interactions with QtQuickVCP. But I did not get this to work within reasonable time
    The development effort was also clearly a downside here
    
    d) Touchy
    Touchy delivered a reasonable graphics performance when using this with a remote X server. I therefore investigated this further and realized that this is actually fast enough with X running on the BBB itself. I assume this is because touchy will not create a preview. Since I'm running a lathe which is 2D only this is actually good enough.
    
    My learnings:
        - Touchy is what I will be evaluate / use further. If my requirements would have included a working preview I would have continued with QtQuickVCP.

X Display system + touchsceen.
    - I'm using a waveshare 7" touchsceen. My first attempts to get this to work failed (touch was not working). 
    It started to work after I installed lxdm but likely this was because some tools got installed in this process. I did not figure out the details here.
        
Autologin
    follow these steps to automatically log to the terminal: https://unix.stackexchange.com/questions/401759/automatically-login-on-debian-9-2-1-command-line
    and add startx [run.py] to your .bashrc

Monday, October 30, 2017

DE0-NANO-Soc Stretch image

There is now a Debian Stretch based Machinekit SD card image for the DE0-NANO-Soc.

It contains the new machinekit code which uses the new czmq4 API, so the RIP build is fully updateable from the main Machinekit repo.

The image is not extensively tested, but runs the mksocfpga sim fine, so should not have any issues with hardware.

The image is in compressed .xz format, expanding to 5GB approx.
It is heavier than previously, but does contain all the tools and libraries
necessary to rebuild Machinekit in situ and do some development.

There is a .bmap file with it to allow copying to card using bmaptool.

Files are located at:
http://deb.machinekit.io/uploads/de0-nano/debian-9.2-console-armhf-2017-10-29

You will need to write to at least a  8GB card and expand the fs
That will allow room for a swapfile, which is essential for rebuilding the RIP
using -j2, or else you will run out of memory compiling the C++ elements,
because g++ is particularly memory hungry in later versions.

Wednesday, February 15, 2017

Multicore merged into Machinekit

This is to advise users, that a major merge has occurred in the Machinekit repo.

The work christened 'multicore', has been finalised and tested for the last few months and as of 3rd Feb 2017 is now part of Machinekit.

What is multicore?
This talk from 2015 gives the full details.
https://plus.google.com/events/cvhj9r8m2gh0v0kj7ccme36hlpo

What do you need to do?

With 3 particular exceptions, nothing at all, the aim has been to make it backwardly compatible,
so all your configs should work as before.

Please report any problems via the tracker at https://github.com/machinekit/machinekit/issues/1123

Once any teething problems are sorted, the capabilities and enhancements available within the code, will be rolled out, documented and advised for any users wishing to make use of them.

Exceptions

  • The primary exception is for anyone using the DE0-NANO-Soc or Zynq as a Mesa 5i25 replacement
Improvements to the hm2_soc_ol driver now make use of a different string argument handling mechanism.

In practice, this simply means editing your hal file driver instantiation line from
newinst [HOSTMOT2](DRIVER) [HOSTMOT2]DEVNAME config=[HOSTMOT2](CONFIG)
to
newinst [HOSTMOT2](DRIVER) [HOSTMOT2]DEVNAME -- config=[HOSTMOT2](CONFIG)

The 2 dashes route the config string to the driver via a safer mechanism.
Any integer instanceparams such as 'debug=1' are passed as previously, so remain to the left side of the delimiter

If interested, this gives more details
https://github.com/machinekit/machinekit-multicore/issues/20

The binary SD card image for the DE0-NANO-Soc has been updated with a new
pull of Machinekit, containing Multicore available from
http://deb.machinekit.io/uploads/de0-nano/debian-8.5-console-armhf-2017-02-14/


  •  The multicore concept relies upon atomic operations in the C11++ standard and newer
These are supported sufficiently in gcc 4.7.2 and above in x86, which means the code will build under Wheezy with backports installed


Originally there were problems building for wheezy-armhf.
This was because all embedded toolchains have effectively deprecated gcc-4.7.

Builds had to be done on gcc-4.9 but ABI peculiarities meant that even linking with 4.9 left an unmet dependency that shouldn't have really been there.

Charles battled this for several days and has now sorted it and armhf packages for Wheezy are being built.

Users are however encouraged to upgrade from Wheezy, which is almost 'end of life' and no longer receiving new backports from Debian in any case.
All support will end in 2018.


  • Something that will only affect users who have written their own C components which use ringbuffers.  (We have no idea if there are any out there.)
An API change sees
hal_ring_detach(char *name, ringbuffer_t *rb)
become
hal_ring_detach(ringbuffer_t *rb)

Thursday, January 12, 2017

Beta Test volunteers wanted.

For a while there has been a parallel repo on github that incorporates the multicore capabilities developed by Michael Haberler and Mick Grant a couple of years ago into the main machinekit repo.
This talk from 2015 gives the full details.
https://plus.google.com/events/cvhj9r8m2gh0v0kj7ccme36hlpo

Volunteers are wanted to do the initial backward compatibility testing.
95% of existing configurations should work unchanged.
A few specialised configs that use ring buffers and some other components will require minor API syntax changes, which can be advised on a case by case basis.

After testing for any problems in backward compatibility, it is intended to merge with the main machinekit repo.
Thereafter the features of multicore can be tested and rolled out, without any impact upon the majority of the user base, who can just carry on as before.

Testers need to be able to build and run RIP builds,
        (http://www.machinekit.io/docs/developing/developing/ )
set debugging levels
        ( http://www.machinekit.io/docs/config/ini_config/#sub:EMC-section  - DEBUG=7 is normally sufficient)
and provide comprehensive logs of any errors
        (copy of relevant section of /var/log/linuxcnc.log, copy of dmesg for segfaults etc. and stderr output to terminal)
plus access to complete configs that produce them.
        (preferably via a github repo)

Testing across as wide a range of computers and machines as possible is crucial.

The repo is here http://github.com/machinekit/machinekit-multicore.git

If you are able to test;
from a terminal session
clone it
        (git clone http://github.com/machinekit/machinekit-multicore.git)
build it locally
        (cd machinekit-multicore/src && autogen.sh && configure (insert any platform specific switches) && make -j$(nproc) && sudo make setuid)
then set the env
        ( cd ../ && . ./scripts/rip-environment )
run your existing configs.
         (machinekit   ---- then select your config)

Results, bugs queries etc should be addressed to < https://github.com/machinekit/machinekit-multicore/issues/10 >


Sunday, November 20, 2016

DE0-Nano-Soc update on SD card Images

In my last entry I mentioned problems with the new SD card image and my use of a previous image.

This has now been resolved.

There was what equated to a typo in the device name specified in the .ini file for the sample configuration.
(I say 'equated', because the name was deliberate, but when it was deprecated in favour of a common one across Altera and Zynq platforms, the sample config was not updated)
Thus anything based upon the sample, as mine was, did not work.

The image build system is in the process of being regenerated, once some other glitches are straightened out.

There is now an image with the repo as of 14/02/2017 here
http://deb.machinekit.io/uploads/de0-nano/debian-8.5-console-armhf-2017-02-14/
It includes the multicore code, with the updated hm2_soc_ol driver and
it has a 512MB swap partition, which makes it easier to rebuild and use both cores without running out of memory.

In my last entry, I also advocated the use of gparted to extend the rootfs partition to use the available SD card space.

Having twice had failures using gparted to do just this with SD cards recently, I have hit upon a successful command line strategy.

The images consist of a 1M uboot partition and an approx 3.6G rootfs partition.
If we use the designations on my desktop (which has a lot of other disks), they
are
/dev/sdf1 uboot
/dev/sdf2 rootfs

Because there are no partitions after /dev/sdf2, it is possible to delete the partition, then create a new one starting at exactly the same sector, but encompassing the whole SD card.
Then we need to fix up the file system and expand it to the new partition size.

# check it is as you expect                                                                              
$ fdisk -l /dev/sdf                                                                                                
                                                                                                                         
$ umount /dev/sdf2                                                                                             
                                                                                                                         
$ fdisk /dev/sdf                                                                                                    
                                                                                                                         
# command d to delete partition                                                                     
                                                                                                                         
# select partition 2                                                                                          
                                                                                                                         
# w to write to disc                                                                                         
                                                                                                                         
$ fdisk /dev/sdf                                                                                                    
                                                                                                                         
# n to add, primary partition, same start sector as before, select full size    
                                                                                                                         
# w to write to disc                                                                                         
                                                                                                                         
# now fix the file system                                                                                 
$ e2fsck -f -y /dev/sdf2                                                                                        
                                                                                                                         
# resize the filesystem                                                                                     
$ resize2fs /dev/sdf2                                                                                           


Usual caveats apply, back up any data etc. but works fine for me with a card that gparted just hung for 10 mins and produced an error with.

If you create the rootfs partition slightly smaller than full disk size, you can go back into fdisk and create a 3rd partition, then format that as swap and enter it into the /etc/fstab file.
eg.

$ fdisk /dev/sdf

# n add primary partition number 3 use full size

# w to write to disc

$ mkswap /dev/sdf3

$ echo "UUID=<output-from-mkswap-here> none swap sw 0 0" >> /etc/fstab

Helps greatly if you are actually rebuilding machinekit in-situ.

Or you can use the swapfile method detailed in Michael's gist .
https://gist.github.com/mhaberler/89a813dc70688e35d8848e8e467a1337 
Cat skinning methods are plentiful 😼
 

Friday, November 18, 2016

DE0-Nano_Soc and the DB25 interface board - real world testing

You will recall, that a while back, Charles Steinkuehler announced the completion of the initial work to get the DE0-Nano board running with machinekit and FPGA programmed to act as a Mesa 5i25 replacement


http://blog.machinekit.io/2016/04/altera-soc-running-machinekit-with.html

In the next stage, Charles designed a DB25 connected interface board, with pin-outs matching the P2 and P3 headers on a 5i25.


https://oshpark.com/shared_projects/ZSjsiCUd

I finally got hold of one of these interface boards, courtesy of the surface mount component soldering skills of Bas de Bruijn.

There was a comparatively simple way for me to test its capabilities.
I already had a turret knee-mill in my workshop, that I had converted to Machinekit and which utilised a 5i25 and 7i76 Mesa combo.

I simply needed to unplug the DB25 lead from the 5i25 to 7i76 and connect instead to the interface board P2.
I was utilising an encoder on the 5i25 second header, so I connected this to the interface board P3.


  • First steps.

I already had a SD card image built by Michael Haberler to run the board and program the FPGA.

( These images are now deprecated, use:
http://deb.machinekit.io/uploads/de0-nano/debian-8.5-console-armhf-2017-02-14/ )

You will need package bmap-tools to write this to SD and verify.

Then use gparted to expand the second (rootfs) partition to the full size of the remaining space on the card.
You could also create a swap partition if space allows, then edit /etc/fstab to use this.

  • Setting up the image
Quite uniquely, the NIC does not have a preset MAC code and one has to be set
Michaels gist deals with how to do this, via a UART connection into something like CuteCom.
You need to enter any keystroke whilst in the first stage of boot, set the environment to include the MAC address and then trigger a reboot.

=> env default -a
## Resetting to default environment
=> setenv ethaddr ba:d0:4a:9c:4e:ce
=> saveenv
Saving Environment to MMC...
Writing to MMC(0)... done
=> reset

At the second boot you will get a terminal prompt,
default user is machinekit, password machinekit

Do a sudo apt-get update and install any extra packages you require, 
but do NOT apt-get upgrade if you are using this image, because there is a later one, and upgrading will overwrite its components and I could not get that one to work.

  • Running 
(This section assumes familiarity with 5i25 configs.)

The only changes I needed to make to my config for the mill were at the top of the ini and hal files
INI:

[HOSTMOT2]
DRIVER=hm2_soc_ol
BOARD=de0n
CONFIG="firmware=socfpga/dtbo/DE0_Nano_SoC_DB25.7I76_7I76_7I76_7I76.dtbo num_encoders=2 num_stepgens=4"


HAL:

loadrt trivkins
loadrt tp
loadrt [EMCMOT]EMCMOT servo_period_nsec=[EMCMOT]SERVO_PERIOD num_joints=[TRAJ]AXES  tp=tp kins=trivkins
loadrt hostmot2 debug_idrom=1 debug_modules=1

loadrt [HOSTMOT2](DRIVER) config=[HOSTMOT2](CONFIG)


NB. if you copy & paste from the sample config, note that tp=tp kins=trivkins is commented out in that config

The eagle eyed amongst you may have spotted that I specified encoders=2 in the config line

Each header on the 5i25 and thus the Nano, only has 4 stepgens and 1 encoder, what this does is effectively enable the second DB25 header output socket on Charles's interface board (equivalent to the header P2 on the 5i25) and the encoder.01 can be accessed from that.

I use the second encoder solely for a hardware pendant MPG on this mill, all the IO for the switches etc on that pendant go onto the 7i76 and are dealt with on the primary header. 


It really was as simple as that.

I ssh'd into the Nano from another computer, using X forwarding
(ie. ssh -X machinekit@192.168.1.XX
entered the /home/machinekit/machinekit directory which houses the pre-built RIP build.

Invoke `machinekit`, select the relevant config and it worked seamlessly, just as it had before.

This is a major achievement by Charles Steinkuehler, Michael Haberler, Michael Brown and Devin Hughes in particular.

Much kudos to them all. 

Monday, September 12, 2016

Introducing a blog about Machinekit, 3D printing, QtQuickVcp and more

Hello Machinekit community,
I recently started a new blog about Machinekit, 3D printing, QtQuickVcp and more (probably tech related) - machinekoder.com. My intention is to write a new article at least once a week.
Since I would like this blog to be a useful resource for any Machinekit interested person, I would very much appreciate if you propose topics that interest you most.
I think there is some interest in basic Machinekit getting started tutorials. Of course, I will try to merge things back to the main Machinekit docs if they prove useful.
Four blog posts are already waiting for you on http://machinekoder.com

Greetings,
Alex Rössler (Machine Koder)